
One of the major goals of education is to help students communicate effectively. Educators often report wanting to help students develop voice in order to communicate verbally what they have learned. Unfortunately, many educators have trouble finding ways to incorporate this type of instruction into their lessons. Flipgrid is designed to do just that — give students a fun and creative avenue to develop voice and provide educators with a simple way to integrate it in their classroom. With each video creation, students consider how they are perceived, the content of what they have shared, and are given opportunities to make changes in response to feedback. Through this process, Flipgrid helps students become stronger communicators and involved digital citizens.
Flipgrid is the leading video discussion platform used by millions of Pre-K to PhD educators, students, families, and organizations in more than 150 countries! Create a Grid (that’s your classroom or group), add Topics to spark the discussion, and your community builds a dialogue as they share short video responses. Super simple. Super powerful.
How to Set Up A Flipgrid Account
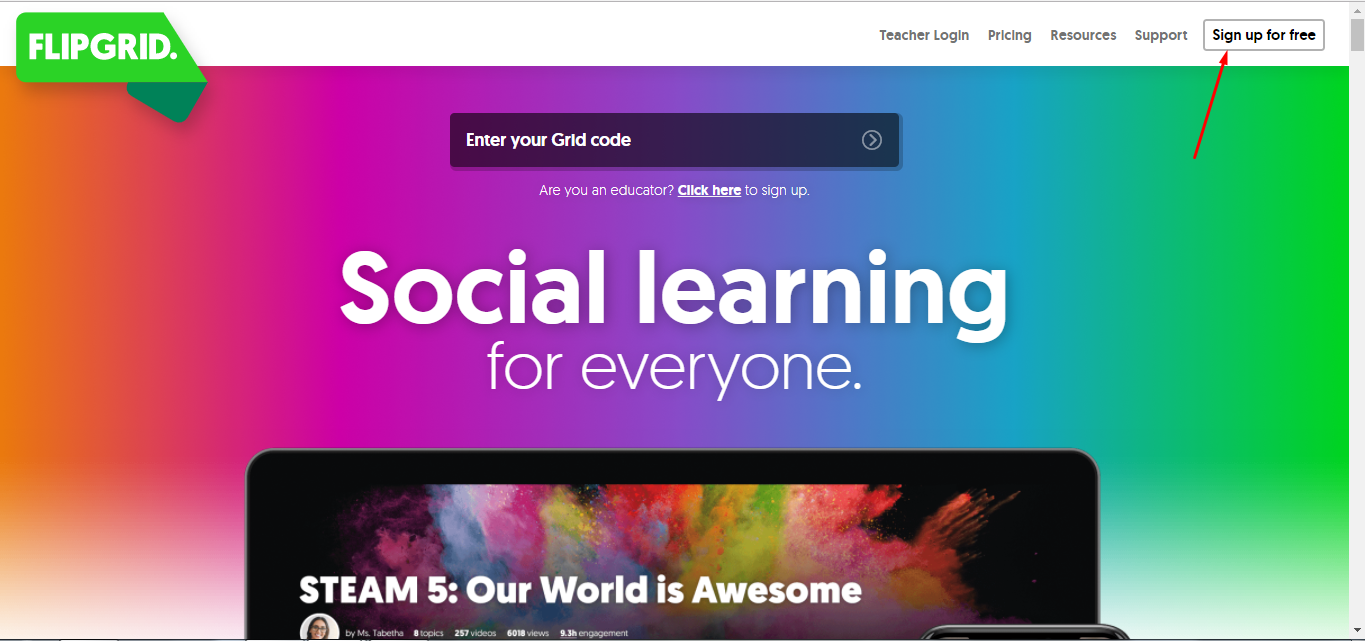
- Go to http://www.flipgrid.com. Click on the “Sign Up For Free” box in the upper right hand portion of the screen.
- Fill out the information (First Name, Last Name, E-Mail, Password, Account Type, Instruction Type, School, Institution, Organization). When finished, click “Create My Grid.”
- Next, you’ll want to create a “New Grid” by clicking on the blue “New Grid” button on the My Grids page. Unless you purchase a classroom version of Flipgrid, you will only be allowed to have one grid.


Here’s an example of our #TRIADvances Professional Development grid that
we created for Triad.
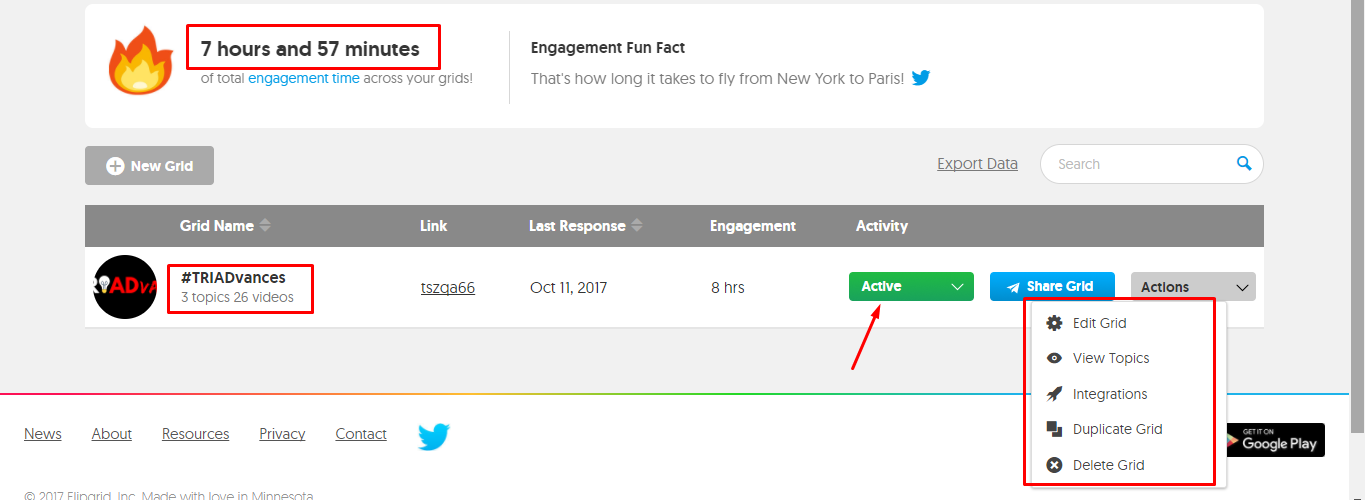
As you can see, Flipgrid provides you with a wealth of information on your grid dashboard like engagement time, how many topics you’ve created, and how many videos uploaded. You can also make your grid “Inactive” so users can’t access it should you decide to shut it down for a while. You also have the option to edit the grid, view topics, integrations, duplicate the grid, and delete the grid under the “Actions” button.
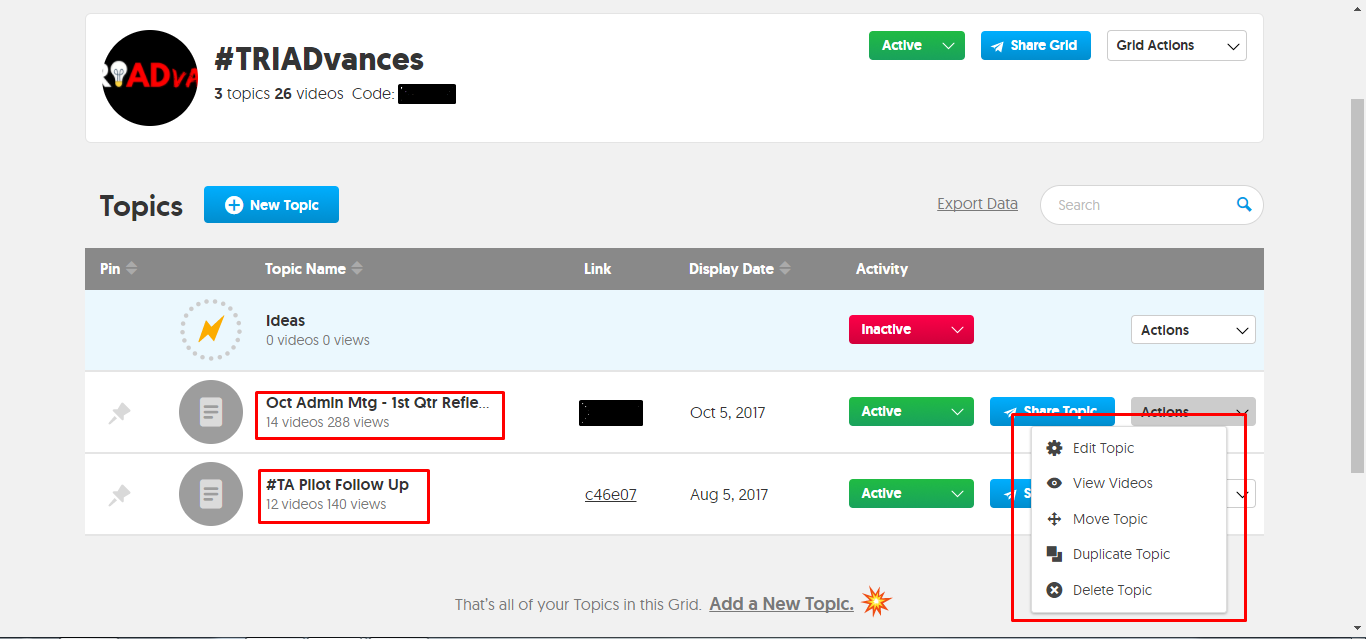
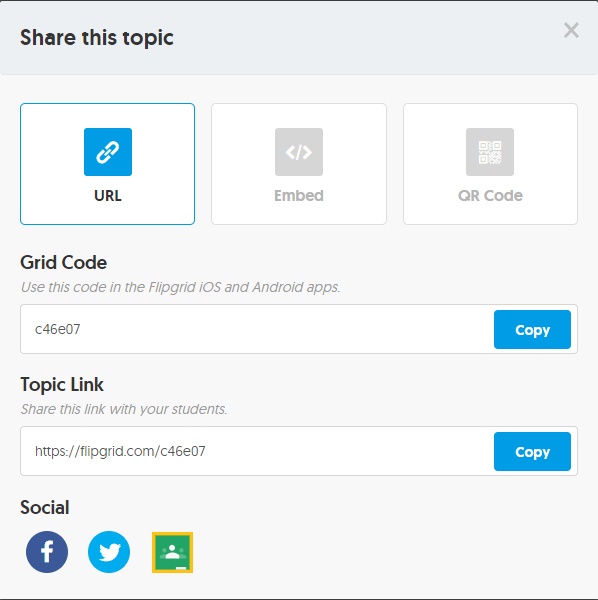
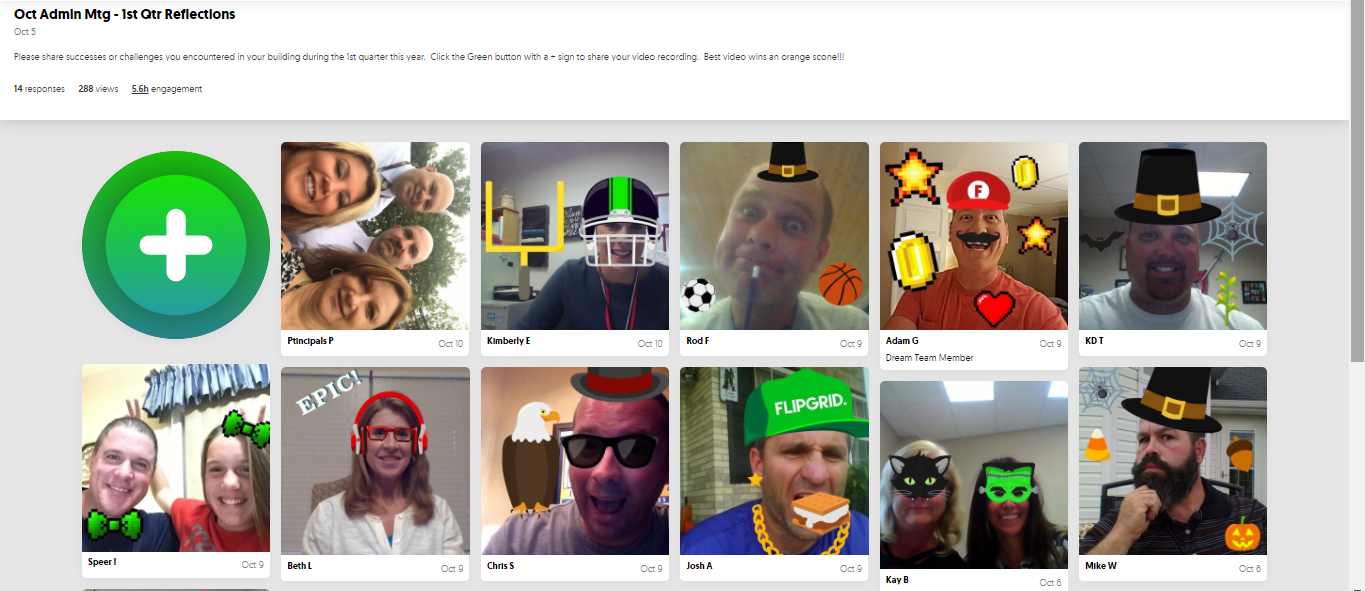
4. Click on the Grid Name to view your topics. To create Topics, click on the blue button titled “New Topic”. We have two topics on the graphic below. One in which we asked for follow up on a district wide pilot program and one in which we asked our administrators to reflect on their first quarter. Notice, each topic has link. If you were to type http://www.flipgrid.com/c46e07, you would be able to access and add to the topic. There are also editing options available for topics as well under the “Actions” button.
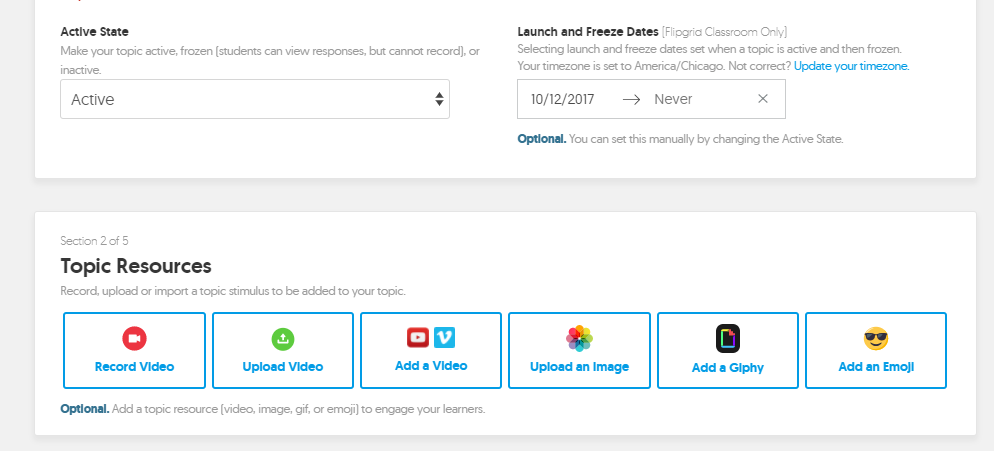
5. When creating a topic, you can customize it to fit your needs. Give it a title and date. Choose a Video Response Time (the free version is limited to either 15 seconds or 1 minute 30 seconds). Type out the directions of what you’d like the users to contribute.
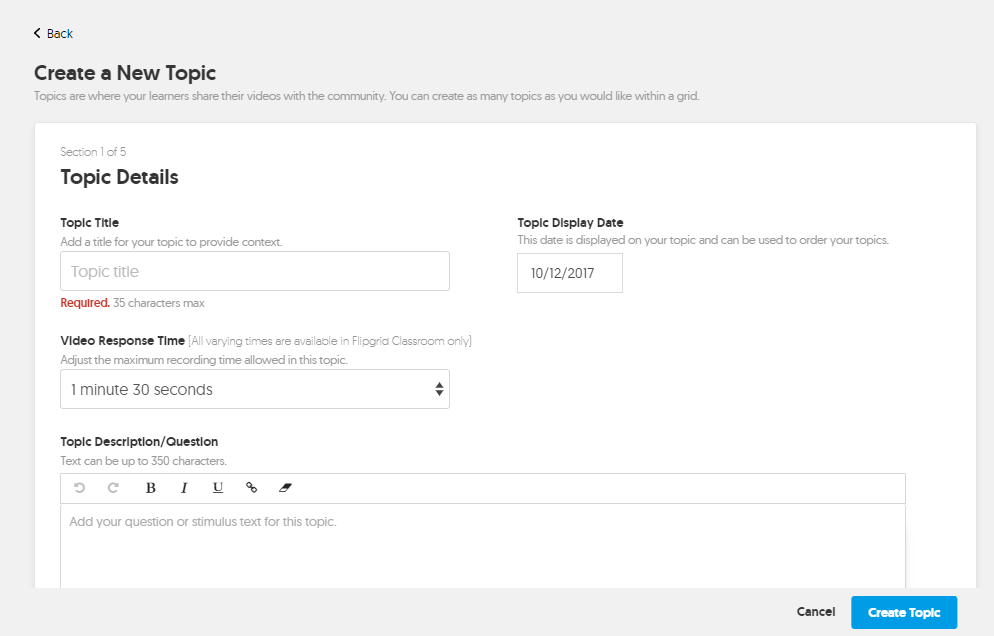

A nice feature that students love is the selfie decorations. When a user submits a video, it asks the user to take a selfie before submitting and users can add stickers and drawings to liven up his/her selfie. You can also turn on the Response Moderation so you have to approve every response submitted. The downfall to this setting is that Flipgrid does not alert you when a user submits a response so you have to manually go in and see if someone responded, watch it, and then decide whether to approve the video.

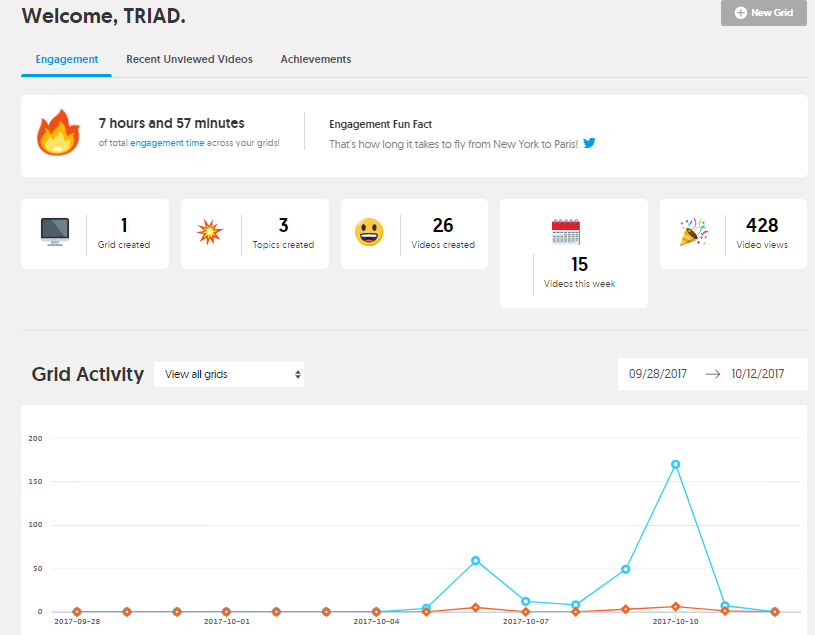
Flipgrid Dashboard
The Flipgrid Dashboard is a great visual snapshot of your activity in Flipgrid. An example of a Flipgrid Dashboard can be found below.
So, I’ve created a Topic. How do I share it with the students?
On the Topic page, click the blue “Share Topic” button.

You can copy the URL and paste it in an e-mail. There’s social media interaction with Facebook and Twitter as well as an integration with Google Classroom.
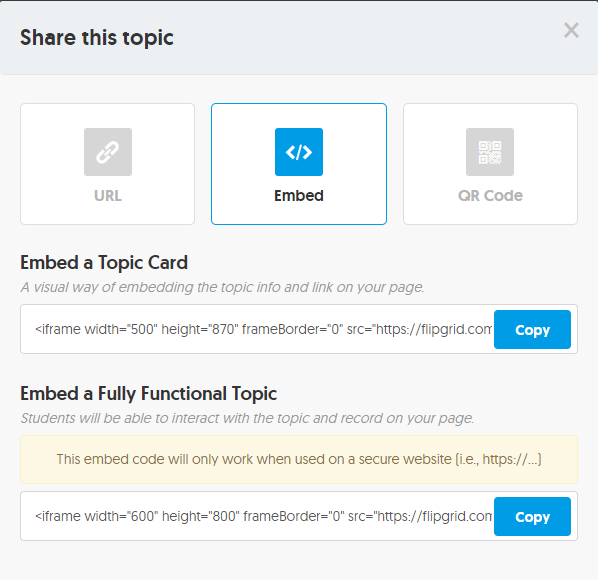
If you have your own web site, you can embed the code directly onto your web site with the code provided by Flipgrid.
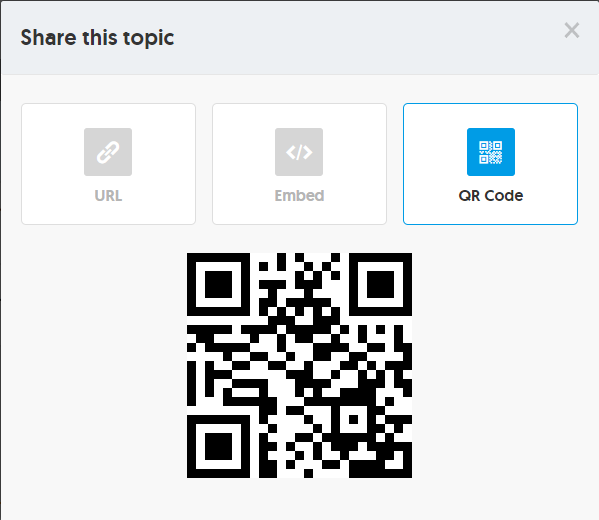
Lastly, You can create a QR code in Flipgrid. Once created, a QR code can be downloaded to be embedded on a web site, electronic newsletter, social media, etc. It can also be emailed to students, embedded in Google Classroom, or printed out and hung on the wall for students to scan with their mobile device.
How do you submit a Flipgrid?
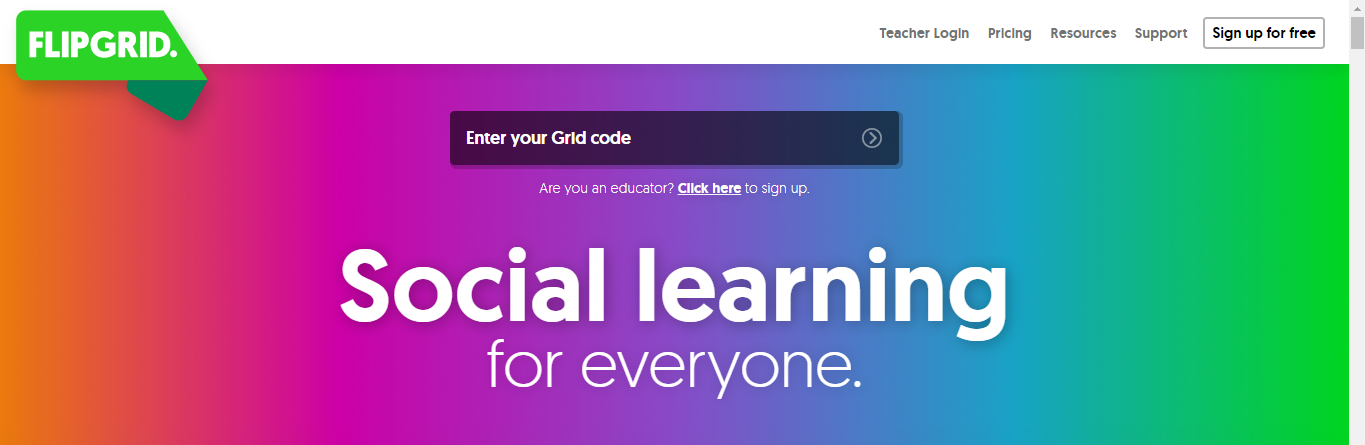
You can either click on the entire link shared with you or go to http://www.flipgrid.com. Once on the web site, you just type in the code for the topic that you need to respond to. You do not have to have a special Flipgrid account to RESPOND to a topic…only to create and moderate topics.
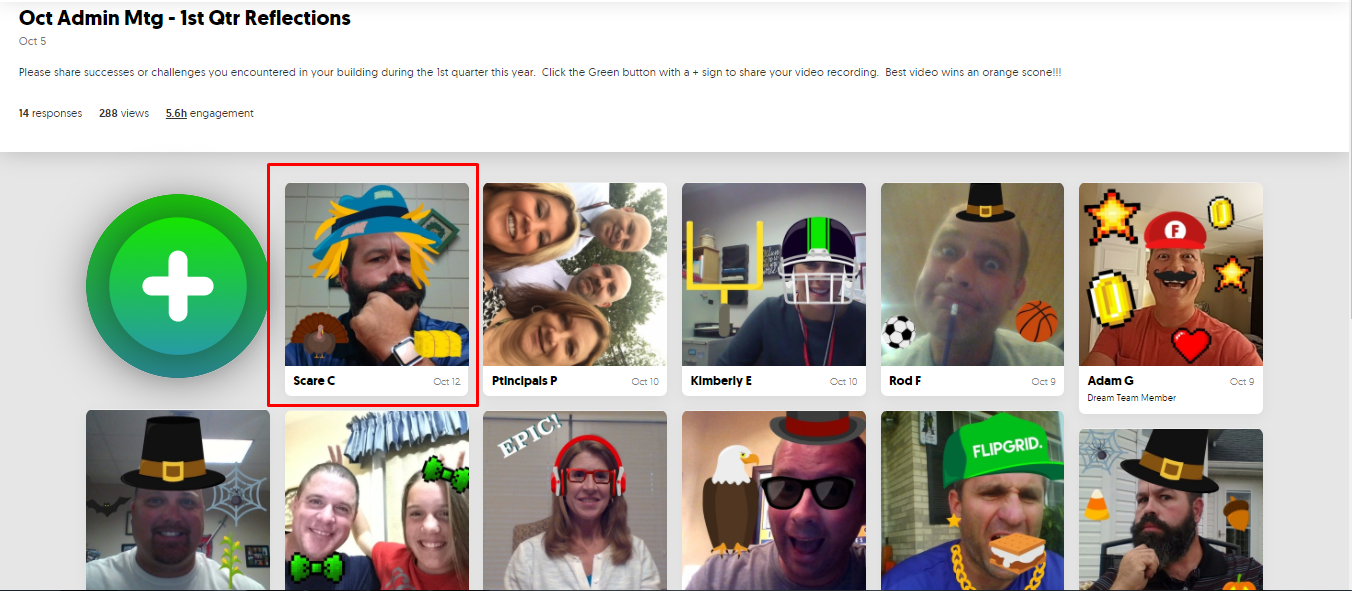
When you put your code in (or type in the entire URL) you will be directed to the topic page with the directions and videos of other people’s responses that you can watch. As you can see from the image below, even our administrator’s had fun with the stickers and drawings!!! To submit your response, click on the big green circle with the white plus.
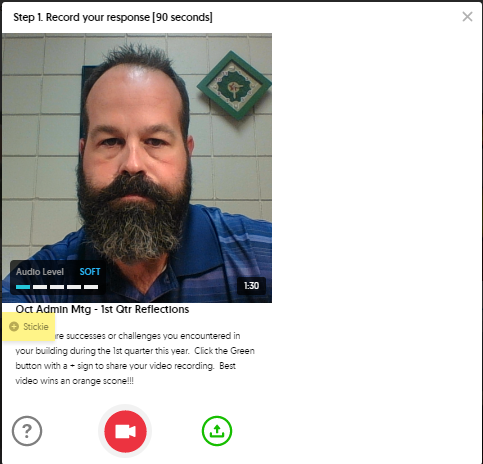
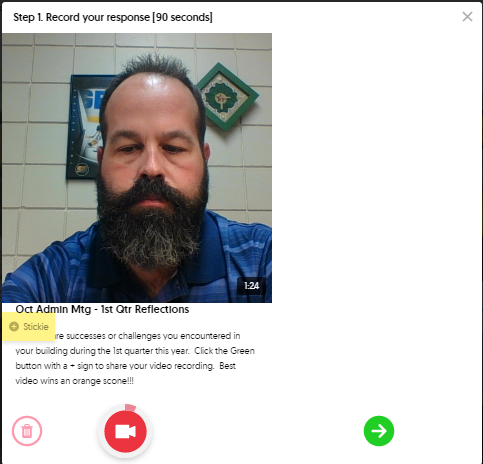
This is what the recording screen will look like on a computer. Click the red button to begin recording. You can pause the recording and restart if necessary. When you’re finished recording, click the green button with the white arrow. When you click the green button, it will replay the video. If you’re not happy with it, you can re-record. If you’re happy with it, click the green button with the white arrow.
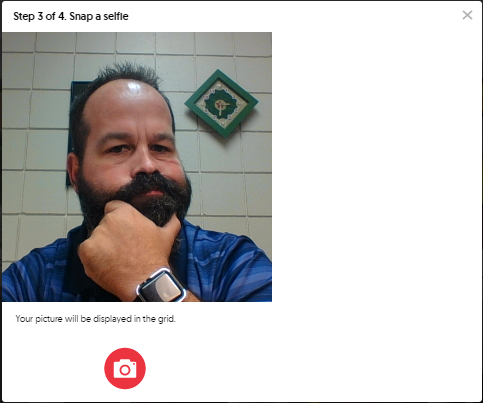
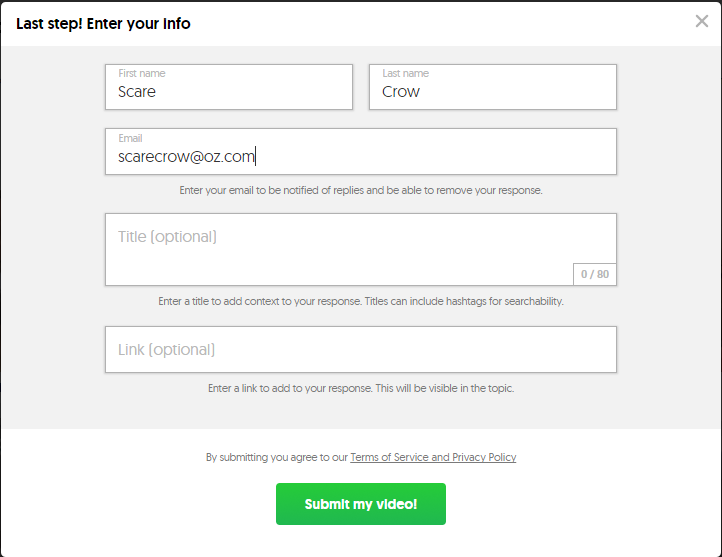
The next step is to snap a selfie which is what will be displayed in the topic for others to view. This is where you can have some fun and add stickers and drawings to your selfie.

Lastly, you need to type in your name (and optional e-mail address) and submit your video.
If your topic is not moderated, it will immediately appear in your topic for others to view.
Flipgrid is mobile friendly.
Flipgrid has an app available in the App Store and Google Play store. Users can submit videos through their phone, chromebook, laptop, desktop, etc. For a laptop and desktop computer, users need a microphone and camera to submit videos.
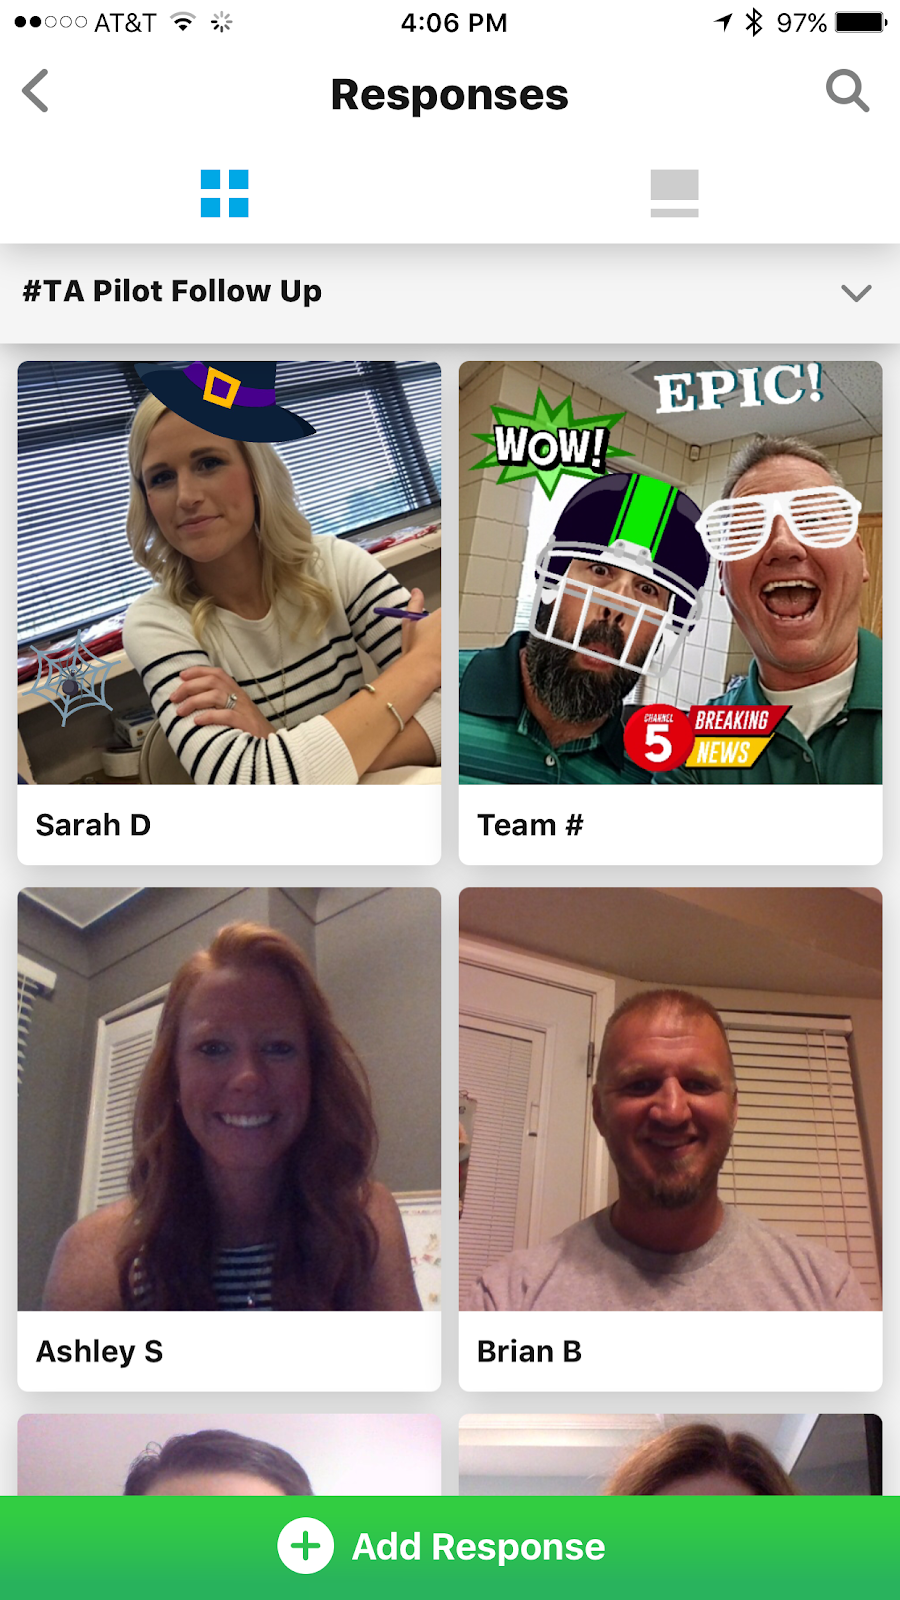
Here are some screenshots from the iOS app.

Classroom Uses of Flipgrid
- Student Introduction – At the beginning of a quarter/semester/year, have the students record a Flipgrid introducing themselves to you and their fellow classmates.
- Exit Ticket – Ask students to reflect on the lesson and provide feedback before they leave class for the day/hour.
- Reading Response – Post a response to reading a book or article. Have students respond to each other.
- Student Support – Student’s can offer support/guidance for incoming students at semester change or the end of the school year.
- Student of the Week – Ask students to share what it means to be “Student of the Week”.
- Weekend Reflection – Ask students to share what fun things they did over the weekend, holiday break or summer break.
- Thank You Videos – Record videos thanking someone for guest speaking, special treats, etc.
- Genius Hour – Have students reflect on each step of the Genius Hour Project.
- Teacher/Principal Appreciation Videos – Have students record a video showing their appreciation for teachers, principals, support staff throughout the year.
- Biographies – Dress up like the person you are studying and record a Flipgrid as that person. Biography book report FLIPPED!!!
Uses of Flipgrid Outside the Classroom
- Quarterly Principal Reflections – Ask your building administrators to submit a Flipgrid outlining some successes and challenges at the end of each quarter.
- Quarterly Teacher Reflections – Ask your teachers to submit a Flipgrid outlining some successes and challenges at the end of each quarter.
- School Announcements – Instead of posting school announcements somewhere, have students use Flipgrid to liven them up!
- Teacher Book Clubs – Use Flipgrid to reflect and discuss books read in a book club.
- PD Opportunity – Use Flipgrid to post quick PD tutorials/opportunities to staff.
- Virtual Cards – Well wishes, Get Well Soon, Happy Retirement, Happy Birthday can all be delivered using Flipgrid.
- PD/Speaker Feedback – Allow staff to use Flipgrid to offer reflection/evaluation of PD or guest speakers.
- Introductions – Have each staff member introduce him/herself using Flipgrid before the school year begins and share the link on the school web site and social media.
- Journalism – Have the journalism club use Flipgrid to interview students/athletes during the school year.
- Weekend Reflection – Ask staff members to share what fun things they did over the weekend, holiday break or summer break.
